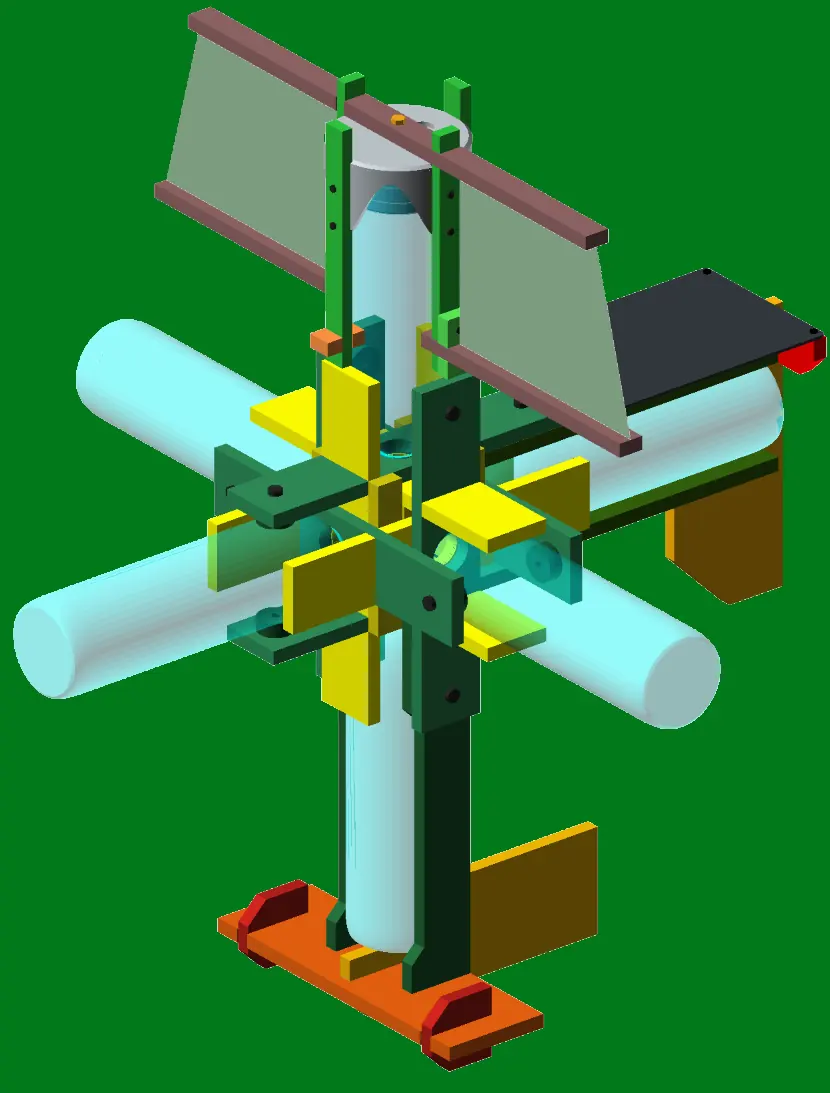
1 Generate Your Blueprints Choose your bottle, then let the generator draw your turtle's wooden parts.
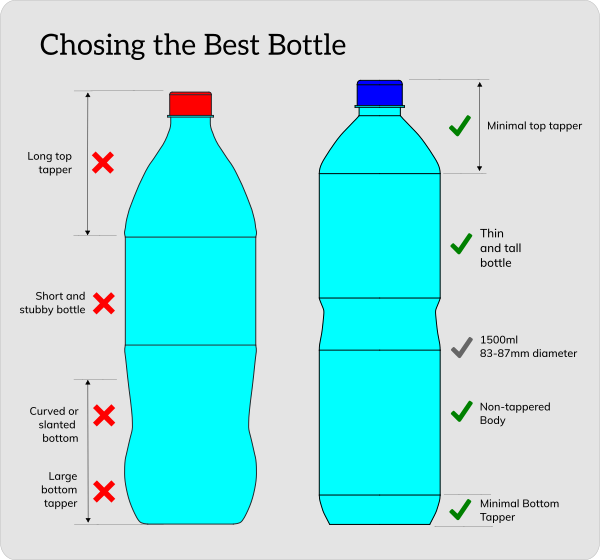
Every Hope Turtle starts with a bottle. The wooden frame — the 6FC Ecojoiner core, the rear fin, the ballast fin and the sails — is sized around the exact bottle you'll be using, so pick one you can find plenty of locally: a sturdy, straight-sided PET bottle (1.5 L is our reference) whose cap and collar are consistent from bottle to bottle. You'll need one for the control bottle and several more for food.
Measure it carefully with calipers — diameter, height, cap, collar and the tapers at the top and bottom — then enter those numbers into our Turtle Generator, along with the thickness of the boards you'll use. The generator is 100% algorithmic: it applies the turtle_body design rules to your measurements and hands back a set of files for each component.
| Method | File | How it's used | Recommended |
|---|---|---|---|
| Carpentry | Print the carpenter sheets: every part dimensioned, with hole positions and quantities. Mark them out on your boards and cut with hand or power tools. | ||
| CNC routing | DXF | 1:1 vector outlines with holes. Import into your CAM software, set your toolpaths and route the parts from sheet stock. | |
| Laser cutting | SVG | 1:1 outlines for a laser cutter (or printed as full-size paper templates). Needs a powerful laser for 12 mm boards. | |
| 3D printing | SCAD | The parametric OpenSCAD model. Open in OpenSCAD to preview the parts in 3D, tweak them, or export STL for printing. |
2 Fabrication Turn your blueprints into real wooden parts.
Carpentry
Our recommended path, and the one the whole design is built around. All you need is a saw, a drill, a ruler, a square and some clamps — tools found in almost every village and town on earth. Print the PDF carpenter sheets, mark each part onto your boards (pallet wood and offcuts work well), cut, then drill the holes. It's slower than a machine and asks for care with your measurements, but it costs next to nothing, needs no electricity beyond a drill, and anyone can learn it. Cut one test joint first to check the fit with your bottle before cutting the full set.
CNC routing
If you have access to a CNC router — at a makerspace, a sign shop or a furniture workshop — the DXF files will give you fast, perfectly repeatable parts, which is ideal if you're building several turtles. Import the DXF into your CAM software, set tabs so parts don't fly loose, and compensate for your bit diameter on the inside slots. The downsides: the machines are expensive, need some CAM know-how, and want flat, consistent sheet material like plywood rather than reclaimed boards.
Laser cutting
A laser cutter gives crisp, precise edges straight from the SVG files and is great for prototyping at small scale — try cutting the parts from cardboard or thin ply to check your fit. But the turtle's structure is designed around 12 mm boards, which most hobby lasers can't cut through cleanly; you'll need a high-power CO₂ machine, and you'll get charred edges that should be sanded. Laser-printed paper templates are a good hybrid: cut them out and trace them onto wood for carpentry.
3D printing
Technically possible — you can export STLs from the SCAD files — but we don't recommend 3D printing the wooden frame. The parts are large, slow and costly to print, and a plastic structure goes against the turtle's regenerative, mostly-organic design. Use the SCAD model instead to preview and customise your design in OpenSCAD. Save your printer for the small, precise parts of Step 3, where it truly shines.
3 Build Your Control Bottle 3D-print the turtle_body v1 parts that turn a bottle into the turtle's steering heart.
The control bottle is the one bottle in your turtle that holds no food: it holds the electronics and drives the sail. Its parts need precision and waterproofing that wood can't give, so they're 3D-printed from the open-source turtle_body v1 STL files. Here's what you'll print:
- The turtle cage The rotating cage that sits on top of the control cap and rides on eight bearing bumps. The sail battens bolt into its grooves, so when the cage turns, the sail turns.
- The control cap The large stationary disk that seals into the cut-open control bottle. Its central bore carries the sail shaft through an O-ring gland, keeping the electronics inside dry.
- The O-ring seal moulder A two-part press mould for casting your own silicone seals: the flat rings that seal the cap insert to the bottle, and the small O-rings that seal the spinning shaft.
- The shaft The round axle that connects the sail cage to the inside of the bottle. A magnet in its lower end lets the turtle's angle sensor read exactly where the sail is pointing.
- The gear chassis Coming soon The internal frame that will hold the motor and gearing that turn the shaft and steer the sail.
These files are currently sized for our reference bottle. We're building a tool that will generate them for your bottle.
4 Assemble Your Circuits Pull together the turtle's hardware stack on its Turtle Shell.
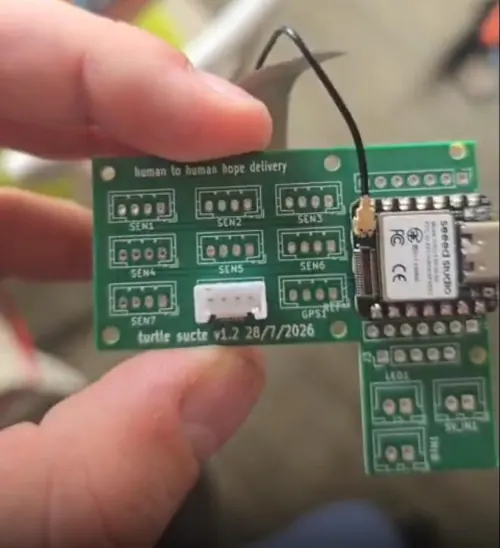
Now for the turtle's brain and nervous system. The hardware stack is built around a Seeed XIAO ESP32-S3 microcontroller, joined by a GPS module, a real-time clock, a battery and power monitor, the magnetic angle sensor that reads the sail shaft, the motor driver that turns it, and a small solar panel to keep everything charged. All of it plugs into the Turtle Shell — our open-source printed circuit board that connects, powers and protects the electronics so they can be tucked neatly inside the control bottle.
There are two ways to get your Turtle Shell:
- Order a shell from us Coming soon A ready-made Turtle Shell, shipped to you from the Hope Turtle Project.
- Commission your own The Turtle Shell's plans are fully open source. Send the Gerber and pick-and-place files to a PCB manufacturer such as JLCPCB or PCBWay in China and have a batch printed and assembled to order.
With your shell in hand, solder on the headers, seat the XIAO and modules, connect the battery, solar panel and motor leads, and test that everything powers up before it goes into the bottle.
5 Put It All Together! Wood, bottles, printed parts and circuits become one turtle.
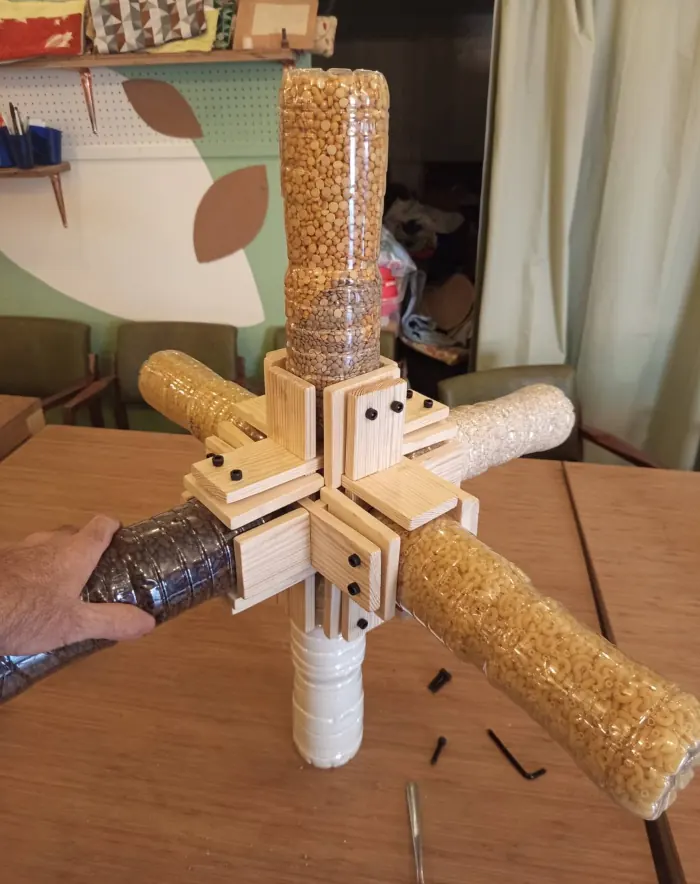
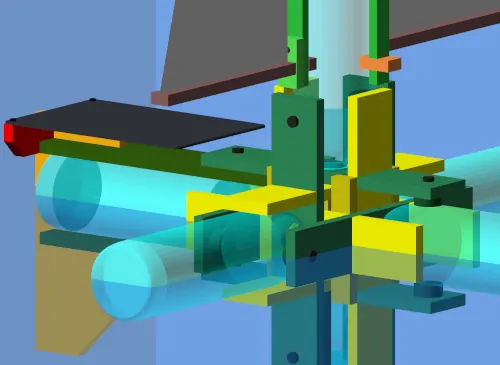
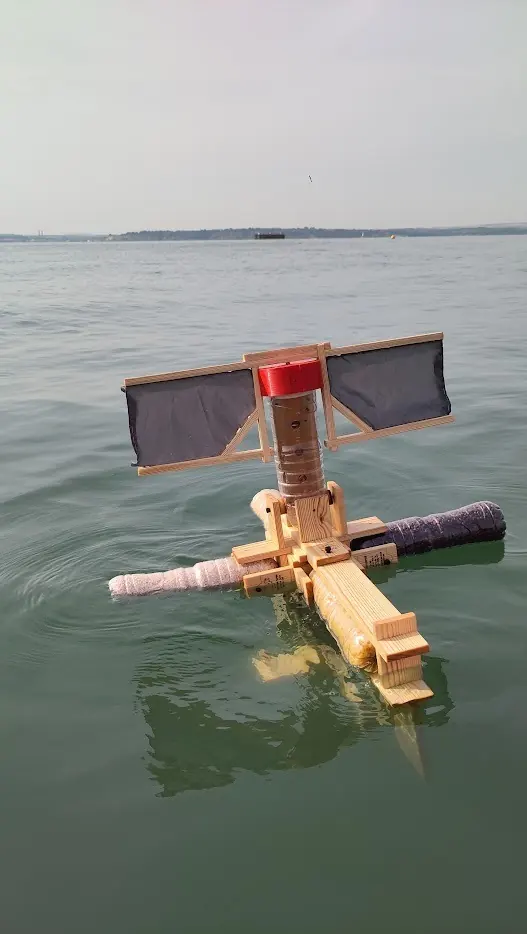
This is the moment it all becomes a turtle. Start with the 6FC Ecojoiner from Step 1: the Long Johns, Little Johns and Final Keys lock together around your bottles, with the deeper-slotted Master John sprung in last to close the frame. The bottles slot into its ports and are held fast by the pressers.
Fit the control bottle from Step 3 in the central position, with your Turtle Shell from Step 4 sealed inside and the shaft rising through the control cap. Seat the cage on top, then bolt the sail frame — top bar, battens and bottom bars — to the cage so the sail swings as the shaft turns.
Finally, attach the rear fin with its solar-panel holder at the back, and the ballast fin underneath to keep your turtle upright and tracking straight. Check every bolt, spin the sail by hand to make sure it moves freely, and float-test your turtle in a bucket, pool or calm water before it goes anywhere near the sea.
6 Set Up TurtleOS Give your turtle its brain — and connect it to your hopeturtles.org account.
TurtleOS is the open-source navigation software that runs your turtle. To install it, you'll need a free Buwana account on hopeturtles.org. Log in, register your turtle from your dashboard, and you'll be given its device ID and device key — the credentials your turtle uses to report its position back to this site.
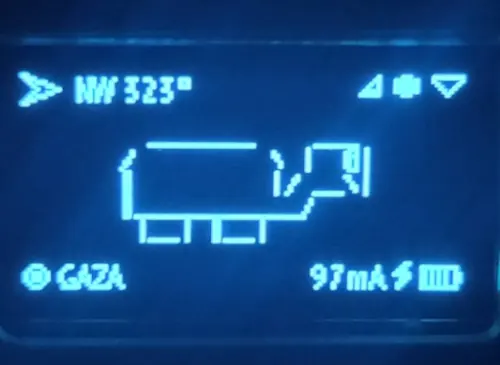
Then plug your XIAO ESP32-S3 into your computer by USB and run the TurtleOS install script in a terminal. It will walk you through flashing MicroPython, then ask for your wifi details and your device keys, write them into your turtle's configuration and install the latest TurtleOS. Keep your device key private — it's what proves to hopeturtles.org that your turtle is really yours.
7 Pack Your Food Bottles Fill the rest of the turtle with something worth delivering.
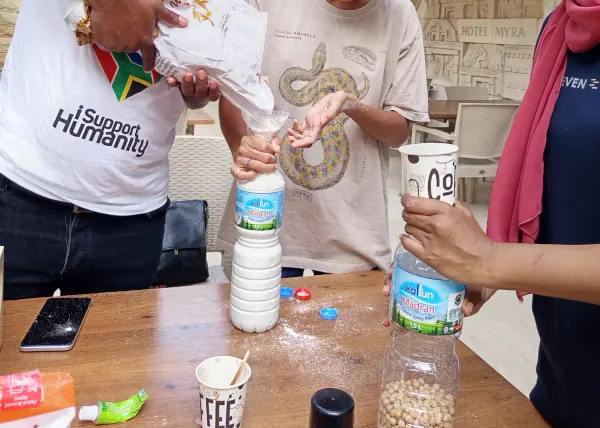
The rest of the turtle's bottles are its cargo — and its buoyancy. Wash and fully dry each bottle (any moisture left inside will spoil the food), fill it with a dry good, and seal the cap tightly. A strip of tape or a dab of wax over the cap adds an extra seal against the sea.
Dry goods that work well:
- Rice
- Lentils and dried beans
- Flour and cornmeal
- Sugar and salt
- Rolled oats
- Small pasta
- Coffee and tea
- Powdered milk
- Nuts and dried fruit
- Spices
The key is to pack every bottle tight. Fill a little, then tap and shake the bottle to settle the contents, and repeat until it's packed right to the top with no air gap. A tightly packed bottle is rigid and strong, keeps its shape against the waves, can't slosh or shift the turtle's balance, and leaves no room for air and moisture to spoil the food. A loosely packed bottle dents, rattles and rots.
8 Download the Turtle Wrangler Your turtle's remote control, in your pocket.
The Turtle Wrangler is our Android app for working with your turtle in the field. It will be available on the Google Play Store soon.
Standing next to your turtle, open the Wrangler, connect to it, and set its two most important coordinates: its Departure — the point it's setting out from — and its Destination, the shore you want it to reach. Pick each one on the map or drop a pin at your current location. The Wrangler sends them to TurtleOS, which uses them to steer the sail toward the destination for the rest of the journey. Then check your turtle's battery, GPS fix and sail sensor before you say goodbye.
9 Deploy or Deliver Set your turtle free yourself, or send it to join a flotilla.
Deploy it yourself
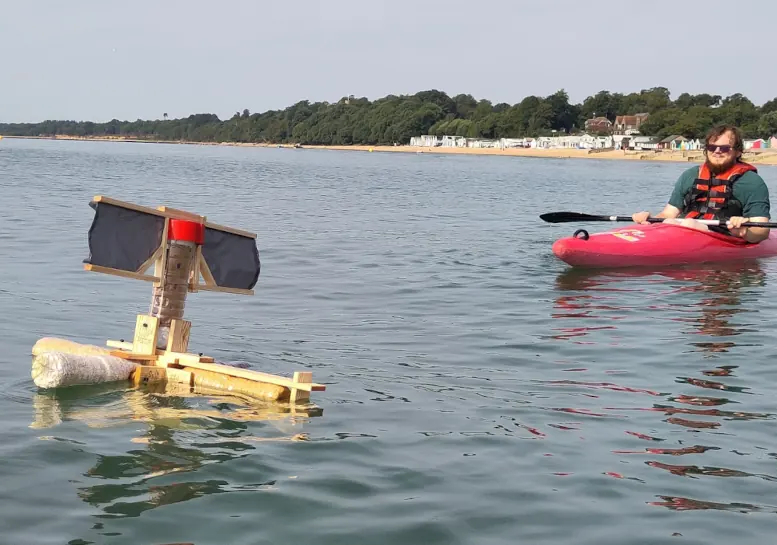
Wait for a windy day when the wind is blowing steadily from your departure point toward your destination — check a local wind forecast, and never launch into an onshore wind that will push your turtle straight back to the beach. Make sure your turtle is powered on and has a GPS fix, carry it out past the breaking waves (by kayak or boat if you can), point it downwind and let it go. Stay a few minutes to watch it find its course.
Deliver it to a flotilla
Not near the right coast, or want your turtle to travel with others? Pack it up — remove the sail and fins, wrap the control bottle to protect the electronics, and box the parts securely — then deliver or ship it to a flotilla reception point. There it will be checked, reassembled and launched alongside other turtles on a community arribada mission, all setting out together toward the same destination.
10 Track Its Progress Follow your turtle across the water.
Once your turtle is swimming, it will report its position, battery and sensor readings whenever it can connect. Follow its journey live on hopeturtles.org — from your dashboard or on the mission map — or in the Turtle Wrangler app. And when your turtle reaches shore, whoever finds it can report the arrival here, closing the loop on its journey.
───🐢───
Now make it better.
Found a better joint, a better seal or a better bottle? Every part of the Hope Turtle is open source — share your improvements on GitHub and help the next builder.